A Step-by-Step Guide on How to Change a Tyre

Published 9 October 2023
Picture yourself driving down the road, enjoying a beautiful day, when suddenly you hear a loud bang and notice a change in your car’s handling. You’ve got a flat tyre! While it may be an inconvenience, knowing how to change a tyre is an essential skill that every driver should have. In this step-by-step guide, we’ll walk you through the process of changing a flat tyre safely and efficiently.
Tools and Safety Precautions
Before you begin, make sure you have the following tools and safety precautions in place:
Spare Tyre: Ensure that your vehicle has a spare tyre, and it’s in good condition. Check the tyre’s pressure periodically.
Jack: A sturdy, functional car jack is crucial. Make sure it’s rated for your vehicle’s weight.
Wheel Brace: This tool is used to loosen and tighten the wheel nuts on your tyre. It typically comes with your car’s tool kit.
Vehicle Manual: Keep your vehicle’s manual in your glove compartment. It provides specific instructions for changing your tyre, including the location of the jack points.
Torch: If you’re changing a tyre at night or in low-light conditions, a torch can be handy for visibility.
Gloves: Protect your hands with a pair of gloves.
High-Visibility Vest: Wearing a reflective high-visibility vest can make you more visible to other drivers, especially if you’re changing a tyre on the roadside.
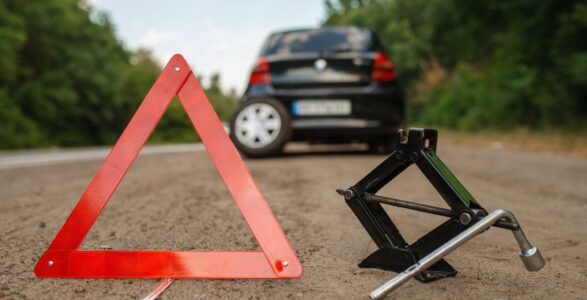
Warning Devices: Place reflective triangles to warn other drivers about your stopped vehicle.
Locking Wheel Nut Key: If your car has locking wheel nuts.
Step-by-Step Guide
Now, let’s go through the process of changing a tyre:
Find a Safe Location:
- Pull over to a safe and level area, well away from traffic. Turn on your hazard lights to alert other drivers.
- If you’re on the motorway, exit if possible, and find a car park or a wide shoulder.
Prepare Your Tools:
- Retrieve the spare tyre, jack, and wheel brace from your car’s boot.
- Put on your high-visibility vest and gloves.
Chock the Wheel:
- Chock the wheel opposite to the one with the flat tyre. This will prevent the car from rolling away while it is jacked up.
- For example, if your left-front tyre has a puncture, put a chock behind the right-rear wheel.
Loosen the Wheel Nuts:
- Before you lift the car, use the wheel brace to slightly loosen the wheel nuts on the flat tyre. Do not remove them completely; just break the initial resistance.
Position the Jack:
- Consult your vehicle’s manual to locate the proper jack points.
- Place the jack under the car, ensuring it makes secure contact with the frame.
Lift the Car:
- Use the jack to raise the car until the flat tyre is off the ground. Make sure the car is stable before proceeding.
Remove the Flat Tyre:
- Finish removing the wheel nuts and carefully take the flat tyre off the wheel hub.
Mount the Spare Tyre:
- Align the holes on the spare tyre with the wheel hub bolts.
- Hand-tighten the wheel nuts as much as possible to secure the spare tyre in place.
Lower the Car:
- Carefully lower the car back to the ground using the jack.
Tighten the Wheel Nuts:
- Use the wheel brace to tighten the wheel nuts in a crisscross pattern to ensure even pressure.
- Refer to your vehicle’s manual for the recommended torque specifications.
Double-Check Everything:
- Recheck the wheel nuts to make sure they are properly tightened.
- Put the flat tyre, jack, and tools back in your boot.
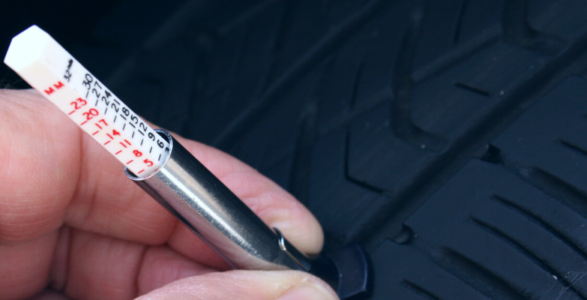
Check Tyre Pressure:
- To ensure your spare wheel is fully inflated, use a tyre pressure gauge if you have one on hand.
- Alternatively, exercise caution and drive to a nearby petrol station where you can access a gauge for this purpose.
- Pump up the tyre to the recommended pressure – as detailed in the handbook – if necessary.
Take Your Punctured Tyre for Repair:
- Visit a garage or tyre fitters at the first opportunity and give them your punctured wheel.
- They will advise whether to repair or replace it.
- Don’t drive on a space-saver spare wheel for longer than is strictly necessary – they are only intended for emergencies.
Conclusion
Knowing how to change a tyre is a valuable skill that can save you time, money, and frustration in emergency situations. While it might seem intimidating at first, following these step-by-step instructions and safety precautions can make the process relatively straightforward. Regularly inspect your spare tyre and ensure that all necessary tools are in your vehicle’s boot so that you’re prepared for unexpected flat tyres on the road. Remember that safety should always be your top priority, so take your time and stay cautious while changing a tyre.
Your Credit Shouldn’t Hold You Back from Leasing a Car
CVS offers budget-friendly leasing solutions, even if your credit isn’t perfect.